-->

Monday, February 28, 2011

Le P'tit Laurent

Le P'tit Laurent
Several of my friends told me Valentine's Day is a Hallmark holiday and that they can celebrate love everyday, they don't need to wait until February 14th. If that's truly the case, they should all plan on taking their beloved to Le P'tit Laurent for a cozy dinner for two.

I was recently invited to be a guest at Le P'tit Laurent and I can't wait to go back. It booked up quickly for Valentine's Day and it's no wonder why. Though located just a hop, skip and a jump away from the Glen Park BART station in San Francisco, it's the quintessential French bistro, decorated with all things French–a pressed tin ceiling, a collection of antique corkscrews, vintage posters and liquor signs. The waiters and waitresses are French. I can't imagine not being charmed from the moment you walk in.

The food is classic bistro fare, onion soup, mussels marinieres, beef bourgignon, cassoulet, frisee salad with bacon and poached egg, bouillabase. Call if French comfort food. These are familiar flavors, nothing fancy, but hearty and warming. I had the Rabbit Normandy, served with fingerling potatoes. It was rich and had a slightly tangy sauce. The portion was enormous. Prices are reasonable and there is a very good prix fixe for only $22.

For dessert, don't miss the "Pain Perdu" or caramelized French toast with ice cream and a drizzle of caramel sauce. One bite and you will forget you are in San Francisco and all the cares of the world will melt away like the ice cream on your plate. And isn't that the point of going out to eat in the first place?

Le P'tit Laurent699 Chenery Street @ Diamond St
San Francisco, CA 94131
(415) 334-3235
Sunday - Thursday 5:30 pm thru 9:30 pm
Friday- Saturday 5:30 pm thru 10:30 pm

Sunday, February 27, 2011

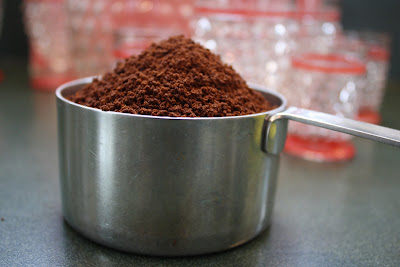
Day 110.5 - Homemade Kahlua...one thing leads to another


Here's how it all started. Yesterday was my birthday, so to celebrate, my angel-husband assembled (most) of our family to go to the Summer Shack - one of my favorite seafood restaurants in my original hometown, Cambridge, MA. Because I'm spoiled rotten, I was fabulously feted with the best company ever, incredible food (oysters and prosecco - seriously, dude, bury me with that combo), and....way too many gifts.

Among them was a beautiful Hobnail glass decanter (circa 1930's) with matching shot and aperitif glasses, found in Flint, Michigan and purchased on eBay by Kat, my rockin' sister-girl, friend and mother-in-law. Well, with me, one thing always leads to another, so driving home, I started thinking (that's where the trouble always starts too), when I announced to my somewhat startled husband that the decanter "wanted" liquor in it and that I aimed to fill it with homemade Kahlua. Knowing better than to try to talk me out of it, or God forbid, suggest something different, he kept his eyes on the road and his hands upon the wheel, nodding in saintly agreement.

This recipe can be doubled if you want to make it as a gift, but plan ahead as it takes 30 days (longer if you can wait) for all the flavors to age and blend. In the meantime,  while I wait for the hooch to age to it's desirous and luscious flavor, I'll be thinking about other things...like, how I might get our local zoning board to agree to let my husband build me a backyard still - you know, for cooking purposes...nothing too complicated.


Homemade Kahlua


1 cup dry, instant coffee
3 1/2 cups white sugar
2 cups water
2 cups 80 proof vodka (any brand)
1 whole vanilla bean

1. Bring water to a full boil. Remove from heat and add the instant coffee and sugar.
2. Stir until sugar and coffee are completely dissolved.
3. Allow mixture to cool, then add vodka and stir.
4. Pour into 1 quart glass, sealable container.
5. Drop one whole vanilla bean into container.
6. Seal and wait 30 days or more before drinking.

Saturday, February 26, 2011

Day 110 - Mexico - Huevos Rancheros with Fresh Salsa & Mexican Hot Chocoloate - Up Next, Microneisa

Dios Mio, I love Huevos Rancheros! But first... I made a total mess of the kitchen.  Mexican hot chocolate bubbling over in the pan all over the stove, chopped cilantro everywhere, jalapeño peppers in my eye, dog trying to steal tortillas off the counter, kid trying to swipe chocolate bar from pantry, couldn't get a decent shot of the finished meal...what I call an absolutely perfect Saturday morning. And, whilst trying to stay one step ahead of all this cooking chaos, I got involved in a Facebook conversation with old and new foodie friends from near and far (shout out to Gwyneth, Larry and Annick) about starting a vineyard/brewery/chocolate business somewhere in the south of France. Oh, the places I'd go if my kids would stop sucking the money out of my wallet.

Officially a Federal Constitutional Republic, Mexico is bordered by the United States, Pacific Ocean, Guatemala, Belize, the Caribbean Sea and the Gulf of Mexico. Having gained independence from Spain in 1821, Mexico is the 5th largest country in the Americas, and the 14th largest independent nation in the world. Considered a newly industrialized country, Mexico is an emerging power in the global economy.

Mexican cooking is renowned for it's diverse flavors, colorful presentation and variety of spices that blends indigenous and European traditions to create one the world's most popular cuisines. Corn and beans are the country's staples, corn most often being ground into masa dough for tamales, tortillas and gorditas.  Squash, peppers, beans, tomatoes and nopales (cactus) are commonly eaten vegetables. Spices include: chili powder, oregano, cilantro, espazote, cinnamon and cocoa.


Huevos Rancheros with Fresh Salsa

6 Tbsp. canola oil
8 (5-inch) corn or flour tortillas
4 large ripe plum tomatoes (seeded)
1/4 cup chopped scallions
1/4 cup chopped cilantro
1 Tbsp. fresh oregano
2 cloves garlic, minced
1 tsp. minced jalapeño pepper, or to taste
1 Tbsp. olive oil
2 tsp. fresh lime juice
salt and pepper to taste
8 large eggs

Put oven rack in middle position and preheat to 200F. Stack 4 oven proof plates on rack to warm.

Heat 1 tablespoon oil in  a 10-inch heavy skillet over moderate heat until hot but not smoking. Stack 2 tortillas in skillet and cook 30 seconds, then flip stack over with tongs and cook 30 seconds more. While second tortilla cooks on bottom, turn top tortilla over with tongs, keeping tortillas stacked. Flip stack again and cook in same manner, turning over top tortilla and flipping stack again so that both tortillas are softened and both sides puff slightly, then deflate (do not let them become browned or crisp). Wrap tortillas loosely in foil and keep warm in oven. Fry remaining tortillas in same manner, adding 1 tablespoon oil to skillet for each batch (do not clean skillet in between).

Puree tomatoes, scallions, cilantro, jalapeño, oregano, garlic, olive oil, lime juice and salt in a blender until very smooth. Carefully add mixture to hot skillet and simmer, stirring occasionally, until salsa is slightly thickened, about 10 minutes.

Heat 1 tablespoon oil in a 12-inch heavy non-stick heavy skillet over moderately high heat until hot but not smoking, then crack 4 eggs into skillet and cook 3-4 minutes for runny yolks, or to desired doneness. Transfer to a plate and keep warm, covered, then cook remaining 4 eggs in remaining tablespoon oil in same manner. Season eggs with salt and pepper.

Spoon 1/4 cup salsa onto each plate and top with 2 tortillas, slightly overlapping them. Transfer 2 eggs to tortillas on each plate and top with some remaining salsa. Sprinkle with cilantro and queso fresco or cheese of your choice.

Mexican Hot Chocolate (Adapted from David Leibowitz)

2 cups whole milk
4 tbsp. unsweetened Dutch process cocoa
pinch salt
3 ounces, Mexican sweet chocolate, chopped
cinnamon sticks for each cup

In medium sauce pan heat milk with cocoa powder and salt, whisking constantly until milk comes to a boil.
Remove from heat, add chocolate and whisk gently until chocolate has melted and is blended.
Add one cinnamon stick to each cup.
Serve warm.

Final Assessment: Dios mio esto fue el desayuno mas increible jamas! I loved this breakfast as it was hearty, spicy, light, healthy and beautiful to look at. The salsa can be made ahead, which cuts the cooking/prep time in half. My new favorite breakfast fo' sho'! And, the Mexican Hot Chocolate.  Heaven help me - this stuff was like nectar of the Gods - rich, not too sweet (no sugar added, just the sweetness of the chocolate), and simply sublime. A++

Wednesday, February 23, 2011

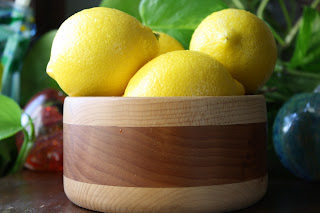
Day 109.5 Moroccan Preserved Lemons


Hand Milled Bowl, by Andrew Cox
In a couple of weeks, I'll be cooking a Moroccan Tagine for the first time. I found a great recipe, but it called for preserved lemons, which I've never used, nor seen  - maybe because I've never looked for them. At any rate, I got curious about this, and lo' and behold, found many recipes - the rest is history.

And, since we're on February vacation (although we didn't go anywhere because we're broke because I spend all our money on food...) I had some extra time...Hence, these beautiful preserved lemons, which won't be ready for 3 weeks, just about the time I reach Morocco. I can't wait! I know, I need help.

Lest you think you'll never make these because you'll never make a tagine, preserved lemons can be used to give all kinds of food a mellow citrus flavor you'd be hard pressed to get any other way. After a couple of weeks in the brine and spices, the lemons develop a silky texture and rich flavor. To use, discard the flesh and pith and then add the rind to couscous, stuffing, risotto, pasta, sauces or vinaigrettes.


Moroccan Preserved Lemons (Adapted from Whole Foods)


1 cup Kosher salt (this is approximate - I used about 1/2 cup in total)
8 lemons
1 tsp. whole cloves
1 tsp. black peppercorns
1 tsp. coriander
1 cinnamon stick
2 bay leaves
1 cup lemon juice

Wash a 1 quart jar in hot soap water, rinse and dry well. Place three tablespoons of salt in each jar. Slice off the top and tip of each of the lemons. Cut each lemon into quarters, but don't cut all the way through the lemon. Make sure the lemon is still attached at the bottom. Open the lemon and sprinkle the inside and outside generously with salt. Place the lemons in the jar, packing them tightly to squeeze out any juice. Sprinkle spices over each layer of lemons. Add more lemon juice so the lemons are completely covered and the jar is filled with juice. Add four tablespoons of salt to the jar. Seal the jar and shake to mix well.

Store in a cool, dark place, turning the jar upside down every couple of days for 1 week. Refrigerate lemons and let them sit for about 2 more weeks, turning every couple of days.

To use a lemon in a recipe, remove a whole lemon from the jar, rinse off any salt and remove the pulp and any seeds. Slice the softened lemon peel and it's ready to use.

Tuesday, February 22, 2011

Day 109! Mauritius - Rougaille (Creole Sauce) - Up Next, Mexico


Original Photograph - The Love of Photos
This wonderful Mauritian Rougaille dish comes direct and authentically to you from my friend, Astrid, a Norwegian transplant to the African island nation of Mauritius.  Were it not for the wonders of the web, Astrid and I would likely never have met. But, because we are kindred foodie bloggers, our paths crossed. We got to chatting and before you knew it, we'd developed a friendship, starting talking food and culture...and the rest is history. Check out her beautiful blog, The Love of Photos. Among other things, Astrid is a photographer, so I've included some of her spectacular shots of her homeland. Although she sent me many recipes, Astrid said Rougaille was her favorite because of it's versatility, so that's what I went with!


Officially The Republic of Mauritius, the country is an island nation off the the southeast coast of of the African continent in the Southwest Indian Ocean. The Republic also includes the islands of Cargados, Rodrigues and Agalega. Languages spoken include Mauritian Creole, French and English. The country claims the impressive credit for being the only land on which the Dodo existed, unfortunately becoming extinct about 80 years after colonization.

Original Photo-The Love of Photos
Mauritian cuisine is influenced by French, Indian, Chinese and indigenous traditions. After the abolition of slavery in the 19th century, Indian workers migrated to the island and brought with them yeast breads, saffron, cumin, cardamom, cloves, vegetables, pickles and dals. By the end of the 19th century, Chinese from the southeast region of Canton migrated to the island, and brought with them noodles, rice and seafood dishes. The result is a wonderful fusion of flavors and dishes unique to the island.


Astrid's Rougaille


1 1/2 lbs fresh tomatoes (about 3 very large), chopped
3 large onions, peeled and sliced
2 Tbsp. fresh ginger, grated
6 cloves garlic (or more), curshed
1-3 sprigs fresh thyme
1-2 Tbsp. parsley, chopped
15 coriander (cilantro) leaves chopped
4 large green chillies, cut lengthwise and seeds removed (optional)
6 spring onions, chopped
Salt and pepper to taste
Oil for frying

Cut tomatoes into 6-8 pieces.
Fry onions in oil, do not let brown.
Add the rest of the ingredients, except tomatoes and simmer for 4-5 minutes.
Add the chopped tomatoes and simmer for 15 minutes.
 *Add sausages, salted or fresh fish, prawn, red meat, chicken or tofu....On Astrid's advice, I used prawns!
**Serve with rice, breads or Indian breads.

Final Assessment: Fantastic! This was so easy to prepare and the flavors were wonderful. I loved the combination of ginger, garlic, cilantro and tomatoes. I served it up on a bed of basmati rice and tandori nan. Not a drop left for lunch tomorrow :)

Monday, February 21, 2011

Ninja Professional Blender Review

Ninja Professional Blender review
I was curious to try out the Ninja blender and to see how it compared to my VitaMix. The VitaMix is tremendously powerful and makes the smoothest creamiest purees, sauces and smoothies. While I love it, I don't love the price, which is around $500.

DESIGN
I like the design of the Ninja. It looks sleek and similar to the VitaMix. The pitcher locks easily onto the base and has a very firm fitting lid with a spout to make adding ingredients or pouring easy. There are only a few buttons and they are all enclosed so it's easy to clean. The pitcher is lightweight and BPA free. The biggest difference in the construction is the blade configuration, there are 6 blades that run up the stem in the Ninja. They are very sharp!

PERFORMANCE
So how did the Ninja do? I did two tests. In one I made a smoothie with milk, ice and a frozen banana. At least, I tried to make a smoothie. What I got was a smooth drink with little chips of ice. No matter how long I blended on high, I could not get the little chips to become smooth. This is something a regular blender also has a problem doing but my VitaMix does very well.

I also tried blending some very fibrous cooked sugar snap peas. The VitaMix blended them into a thin green puree with no chunks or lumps. The Ninja did break up the peas but the result was not liquid, but more like a medium thick puree. I could see each little bit of material broken into what looked like tiny squares, rather than microscopic bits.

RECOMMENDATION
I didn't feel my tests were really enough so I asked my parents to compare the Ninja to the conventional blender they have at home. They were able to turn ice cubes into snow in seconds and found it to be a significant improvement over their regular blender, an Osterizer. All in all, the Ninja does a WAY better job than most conventional blenders. So if you are looking for something significantly more powerful, the Ninja is a good choice. But if you are looking for something as powerful as the VitaMix, this is not it.

COMPARISON
Here is a rough breakdown of the power and price of each:

Osterizer=500 watts $20-$80 depending upon the model
Ninja=1000 watts about $99
VitaMix=1380 watts about $500, depending upon the model

Which blender do you have? Which model do you think is worth the price?

Sunday, February 20, 2011

Day 108.5 - Homemade Pop-Tarts...Get your Kid on


I must say that I have never been a big fan of Pop-Tarts. I find the pastry bland and crumbly-dry and the filling way too sweet and gritty. I will also admit to keeping them stocked in my pantry, calling them "breakfast" when I'm swearing yelling at my 15 year old to get out of bed and get to school on time. To ease  my guilty conscience, I tell myself that Pop-Tarts are the equivalent of toast and jam...errrr...okay, yeah, I know that's a stretch, especially those s'mores "flavored" ones he seems to favor.  But you know, sometimes a mother's gotta do...you know the rest.

So, imagine my delight when I found a recipe for homemade Pop-Tarts in, yes, you guessed it, Joanne Chang's beautiful baking book, Flour. By now some of you may be sick of hearing me heap mounds of sugary praise on her book, but honestly, it's by far the best pastry and baking cookbook I have or will ever own - evah, as we Bostonian's like to say.

Suffice it say, once you try one these homemade Pop-Tarts, you'll never go back. Imagine delicious, fresh fruit jam (pick your favorite flavor), folded inside the flakiest, most buttery pastry imaginable, then topped with a vanilla-y glaze and sprinkles (optional). You will be the envy of your co-workers and your kids and their friends will think you are the coolest parent in the world once you bake up a batch of these. The dough can be made in advance, and the assembly and baking process is relatively quick and easy. If you're really pressed for time, you can use pre-made pastry dough (in the freezer section at most grocery stores), which will be good, but not as decadent as the recipe below. Either way, you will be a pop rock star (get it?), and when you have teenagers in the house, you take the props where you can get 'em.


Homemade Pop-Tarts (From Joanne Chang's, Flour cookbook)

1 recipe Pate Brisse (recipe below)
1 egg, lightly beaten
1 cup raspberry jam (or whatever you like)

Simple Vanilla Glaze

1 cup confectioners' sugar
1/4 tsp. vanilla
2-3 Tbsp. water
Rainbow sprinkles for sprinkling (optional)

Preheat the oven to 350 F.

Remove dough from the refrigerator and divide it in half. Press each half into a rectangle. On a lightly floured surface, roll out each half into a 14-by-11 inch rectangle.  Using a paring knife, lightly score on rectangle into eight 3 1/2-by-5 1/2-inch rectangles (about the size of an index card).

Brush the top surface of the entire scored rectangle with the egg. Spoon 2 tablespoons of the jam in a mound in the center of each scored rectangle. Lay the second large dough rectangle directly on top of the first. Using fingertips, carefully press down all around each jam mound, so the pastry sheets adhere to each other.

Using a pizza cutter, knife of fluted roller, and following the scored lines, cut the layer dough into 8 rectangles. Place the rectangles, well spaced, on a baking sheet lined with parchment paper.

Bake for 35-40 minutes, or until the tops of pastries are evenly golden brown. Let cool for about 30 minutes.

To make the glaze:  While the pastries are cooling, in a small bowl, whisk together the confectioners' sugar, vanilla and enough of the water to make a smooth, pourable glaze.

When the pastries have cooled for 30 minutes, brush the tops evenly with the glaze, then sprinkle them with rainbow sprinkles. Let stand 10-15 minutes to set before serving.

Pate Brisee

1 3/3 cups unbleached all purpose flour
1 Tbsp. sugar
1 tsp. salt
1 cup cold unsalted butter, cut into 12 pieces
2 egg yolks
3 Tbsp. cold milk

Using a stand mixer fitted with the paddle attachment, mix together the flour sugar and salt for 10-15 seconds. Scatter the butter over the top. Mix on low speed for 1-1 1/2 minutes, or just until the flour is no longer bright white and hold together when you clump it and lumps of butter the size of pecans are visible throughout.

In a small bowl, whisk together the egg yolks and mil until blended. Add to the flour mixture all at once. mix on low speed for about 30 seconds, or until the dough just barely come together. It will look really shaggy and more like a mess than dough.

Dump the dough out onto an unfloured work surface, then gather it together into a tight mound. Using your palm and staring on one side of the mound, smear the dough bit by bit, starting at the top and of the mound and then sliding your palm down the side and along the work surface, until most of the butter chunks are smeared into the dough and the dough comes together. Do this once or twice on each part of the dough, moving through the mound until the whole thing has been smeared into a cohesive dough with streaks of butter.

Gather up the dough, wrap tightly in plastic wrap, and press down to flatten into a disk about 1 inch thick. Refrigerate for at least 4 hours before using.

Saturday, February 19, 2011

Day 108! Mauritania - Coconut Pepper Steak - Up Next, Mauritius


Do you ever have days where you set out to do something that should take a couple of hours and 4 hours later, you're still trying to get it done? Making tonight's Mauritanian meal of Coconut Pepper Steak took me forever to prep, execute and deliver. It wasn't all that complicated, I just think my organizational skills completely imploded after a long week. Here's hoping that my personal failings won't be reflected in what turned out to be a really good and interesting North African meal.

Many of the recipes I found called for camel, but as resourceful as I like to think I am, camel was not to be found in these parts. I'm not truly sure how often beef is eaten in Mauritania, but the recipes I found called for beef combined with hot peppers, green peppers and coconut, so if any of my readers know differently, I'd love to hear about it!

Located in North Africa, Mauritania, is bordered by the Atlantic Ocean, Western Sahara, Algeria, Mali and Senegal. The country gained independence from France in 1960, and then following a military coup that overthrew the civilian government in 2008, has since been run by General Aziz. The official language in Mauritania is Arabic, and more than 20% of the population lives on less than $1.25 per day.

The climate in this beautiful country is rugged and unforgiving, yet the primary source of income for many is raising livestock such as dromedaries, which are used for transportation, meat and milk. Dates, lamb, spiced fish and vegetables, meat, couscous, rice, stews, olives and Arabic spices are all popular in this country. Because Mauritania is an Islamic Republic, alcohol is forbidden to nationals, but some restaurants do serve it in limited amounts. Goat, camel milk and tea are the most frequently consumed beverages.


Coconut Pepper Steak (Adapted from Celtnet)

1 1/2 pounds skirt steak, cut into thin strips
1 coconut (water reserved) with flesh cut into strips the same size as beef
4 green bell peppers, cut into strips the same size as the beef
1 hot chili pepper, finely sliced
peanut or canola oil for frying
1 Tbsp. salt
1 tsp. black pepper
3 garlic cloves, minced
6 drops Tabasco
2 Tbsp. soy sauce
2 beef bouillons
4 Tbsp. cornflour

Add the oil to a large frying pan and add the salt, black pepper, garlic and Tabasco. Fry the peppers and chili in this seasoned oil for 2 minutes, then add the steak and fry for another 2 minutes before adding the coconut strips and frying for another 2 minutes.

Mix the coconut water with enough water to make 1 3/4 cups, and bring to a boil. Add the soy sauce and beef bouillon then mix the cornflour with 1/4 cup water for a paste. Add this to the coconut water mixture and stir to incorporate. Continue stirring the mixture over low heat until the sauce thickens.

Final Assessment: Surprisingly tasty and good. I wish I could have sliced the coconut even more thinly, but the dudes in residence liked the crunch of the fruit combined with the spicy meat and sauce. 6 thumbs up from my in-house food critics.

Place the meat mixture on a bed of rice and spoon the sauce over the top before serving.